11
Ductless mini-split heat pumps solve some of the toughest climate control challenges in modern homes. They deliver remarkable energy efficiency, whisper-quiet operation, and room-by-room temperature control without the hassle and expense of running bulky ductwork through closets and crawlspaces. Yet for all their engineering brilliance, wall-mounted air handlers share one glaring drawback: they are conspicuous, hard-plastic rectangles mounted directly at eye level.
If you have spent months curating interior finishes, choosing the perfect paint palette, and investing in tailored millwork, staring at a glossy appliance hovering above the sofa can be infuriating. The natural design impulse is to hide it immediately. Homeowners build ornate wooden boxes, conceal units behind decorative screens, or squeeze them between tight floating shelves.
Unfortunately, treating an active air handler like a static cable box or an electrical subpanel is a fast track to mechanical failure. Concealing a mini-split requires a delicate balance between visual aesthetics and thermodynamic reality. When you starve an air handler of room air or block its throw, you do not just degrade your comfort; you run up utility bills, invite mold growth, and risk burning out expensive components. Designing a cover that looks bespoke while keeping the mechanical system healthy requires knowing exactly how these units breathe and where the non-negotiable boundaries lie.
The Physics of Mini-Split Airflow and Why Boxing It In Backfires
To camouflage an air handler without crippling it, you first have to understand how it exchanges heat. A standard wall-mounted mini-split takes in unconditioned ambient air from the top and upper front of the chassis, pulls that air across an evaporator coil, and blows conditioned air out through the motorized louvers at the bottom.
Inside the unit sits a thermistor, a temperature sensor that constantly reads the warmth or coolness of the returning room air. The entire system relies on steady, uninterrupted convection currents throughout the living space. When you build an unvented or poorly designed enclosure around the unit, you distort that convection cycle entirely.
The most common consequence is short cycling. If conditioned air emerging from the bottom discharge strikes an enclosure baffle, solid door, or closely spaced slat, that chilled or heated air bounces straight back up into the intake grille at the top. The internal thermistor registers that the enclosure has hit your target temperature within minutes, even though the rest of the bedroom or living room remains uncomfortable. The compressor throttles down or shuts off prematurely, leaving you with stagnant air, wild temperature swings, and excessive humidity.
Restricted enclosures also introduce static pressure resistance. Mini-split cross-flow blowers are designed for low-pressure open air distribution. Forcing that blower to pull air through tiny gaps or push air through restricted grilles creates drag. Over time, this static resistance forces the fan motor to work harder, dramatically increases operating noise, drives up electrical draw, and causes condensation to accumulate where it cannot easily drain.
Non-Negotiable Clearances for Wall-Mounted Units
Every mini-split manufacturer, from Mitsubishi and Daikin to Fujitsu and Gree, specifies strict physical clearances around the indoor head. These dimensions are not arbitrary recommendations; they represent the bare minimum physical volume required for the unit to pull in return air, sweep conditioned air into the room, and allow human hands to service the equipment.
Top Intake Clearance
The top of the indoor head is the unit’s primary lung. Most manufacturers require a minimum of four to six inches of clear, unobstructed space between the top of the casing and the ceiling or any structure above it. In high-performance concealment designs, aiming for eight inches provides even better results. If you drop a solid wood soffit or a decorative cabinet roof down to within an inch or two of the casing, the intake will choke, starved of the volume it needs to satisfy the coil.
Side Clearance for Diagnostics and Piping
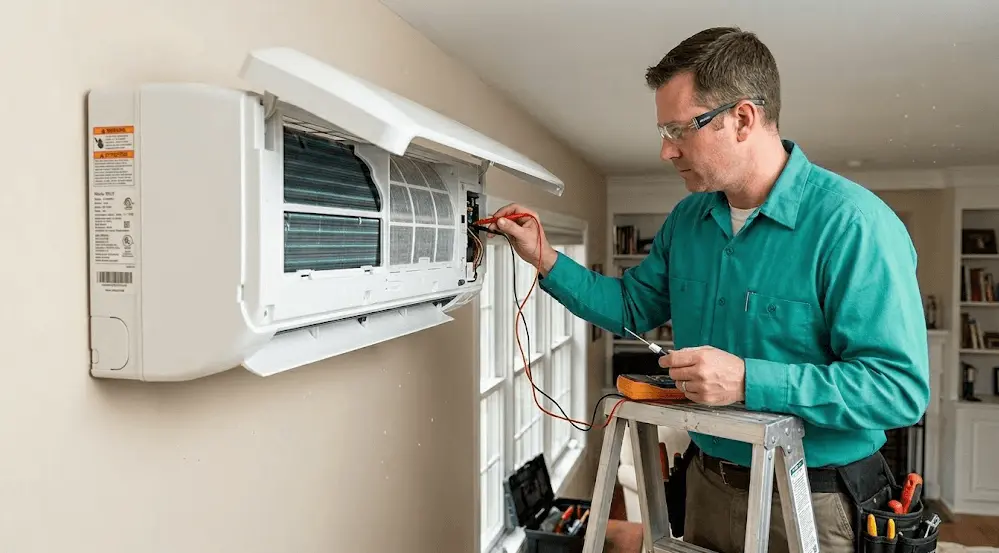
Both the left and right sides of the chassis require at least three to six inches of open space. Technicians need this perimeter to access the internal control boards, route high-voltage and communication wiring, tighten flare fittings on the copper refrigerant lines, and seat the condensate drain line. Enclosing a unit so tightly that a screwdriver or multimeter probe cannot reach the lateral panels guarantees that a service technician will have to dismantle your millwork during a future repair.
Front and Bottom Air Throw
The bottom louvers need an open, straight pathway into the living space. Conditioned air should travel unimpeded into the room at velocities designed to create proper air mixing. Any horizontal shelf, ledge, or framework sitting directly below the louvers must be kept far enough down—typically at least twelve to twenty-four inches depending on the unit’s throw angle—to avoid deflecting the air current directly back into the intake stream.
Sensor and Remote Line of Sight
Most wall heads rely on infrared receivers to communicate with handheld remotes. If you wrap the unit in dense materials without extending a wired wall-mounted thermostat, you will lose the ability to change temperatures or adjust modes reliably. Upgrading to a hardwired wall controller or a manufacturer-compatible Wi-Fi interface lets you operate the unit effortlessly, even if the primary infrared eye is tucked behind slatted millwork.
Smart Concealment Strategies That Protect Airflow
Knowing the physical constraints does not mean you have to abandon the idea of a cohesive interior. You can achieve high-end aesthetic integration by designing around the unit’s operational needs rather than fighting them.
Precision-Crafted Slatted or Louvered Cabinetry
The most popular concealment method is a custom architectural cabinet featuring horizontal slats, louvers, or decorative cane webbing. This approach allows the air handler to hide in plain sight as a stylish built-in credenza or upper wall accent.
For this installation to succeed, the free-air ratio of the front and bottom panels must remain high. A functional enclosure needs an open-area ratio of at least sixty to seventy percent. Thin slats with wide gaps allow air to circulate freely, whereas thick decorative boards separated by tiny pencil-thin slits act almost like solid plywood.
Angle horizontal louvers downward along the bottom discharge area to guide conditioned air out into the living zone, and leave the top of the cabinet completely open or fitted with an ultra-sparse metal lattice. The open top allows ambient room air to drop smoothly into the intake coil without resistance.
The Recessed Framing and Millwork Approach
Rather than boxing the unit into a standalone container, many designers integrate the head into a broader floor-to-ceiling built-in shelving array. By framing the mini-split with vertical bookcases, floating display shelves, and lower cabinetry, the air handler stops looking like a stray machine dropped onto an empty wall and instead becomes part of a deliberate architectural composition.
When taking this route, let the unit breathe on its own shelf compartment. Paint the back wall behind the compartment the same shade as the unit’s casing, or finish the alcove in a soft matte tone that eliminates harsh visual contrast. Leave the front face open, but flank it with books, ceramics, and artwork that draw the eye toward curated objects and away from the plastic housing.
Color Matching and Custom Wraps
Sometimes the cleanest solution involves zero woodwork. Mini-splits stick out like a sore thumb primarily because bright, glossy white plastic clashes sharply with moody paint colors, textured wallpapers, or rich wood accents.
Several manufacturers now produce factory units in matte black, silver, and graphite, while others offer units with customizable front panels designed to hold framed canvas art. If you already own a standard white unit, professional vinyl wrapping offers a safe, reversible way to blend the casing into the surrounding wall. High-grade architectural vinyl wraps can match your paint swatch precisely without adding thermal insulation or blocking internal vents.
Never paint over the louvers, temperature sensors, or internal coil elements with standard wall paint. Thick latex paint gums up mechanical hinge pins, seals intake grilles shut, and emits unpleasant volatile organic compounds every time the unit shifts into heating mode.
Designing for Mandatory Long-Term Maintenance
Any enclosure design that ignores regular cleaning is a ticking time bomb. Ductless systems circulate tremendous volumes of household air, pulling in dust, pet dander, aerosolized cooking oils, and fabric lint. If you make accessing the unit difficult, routine maintenance gets postponed, and dirty equipment fails rapidly.
Routine Filter Access
Mini-split reusable mesh filters require washing every four to six weeks during peak heating and cooling seasons. On almost all modern heads, accessing these filters requires flipping the front plastic panel upward and outward. If your decorative enclosure has a fixed face frame that blocks the front panel from swinging open to a ninety-degree angle, you will have to unscrew carpentry just to rinse a screen. Build your covers with hinged front drop-doors, removable magnetic face frames, or sliding track panels that lift away in seconds without tools.
Deep Cleaning Clearances
Every twelve to twenty-four months, a ductless system requires deep hydraulic or chemical cleaning. A certified technician will mount a specialized collection bib beneath the unit to pressure-wash the indoor barrel blower wheel and the aluminum evaporator fins.
This service requires full visual and physical clearance around the lower casing and condensate pan. If your millwork wraps too tightly around the base of the machine, the technician will be unable to hook the cleaning bib in place, leaving you with poor blower performance and the sour odor of deep-seated biological growth.
Protecting the Outdoor Condenser
While homeowners obsess over hiding the indoor air handler, the outdoor heat pump condenser frequently suffers from identical design mistakes. Outdoor units tucked against patios, decks, or pool areas often get wrapped in dense privacy fencing or buried behind bushy hydrangeas.
Outdoor condensers reject enormous amounts of thermal energy. If you surround the exterior unit with a solid privacy screen, it will pull its own hot exhaust air back through the outdoor coil during the dog days of summer. This recirculation drives system head pressure through the roof, spikes your electric bill, and eventually trips thermal overload switches on the compressor.
Keep all landscaping, decorative lattice screens, and solid fences at least twelve to twenty-four inches away from the rear and sides of the condenser, and maintain at least thirty-six to forty-eight inches of open clearance directly in front of the exhaust fan. Louvered outdoor screens work well, provided the slats are angled to direct discharge air away from the home and allow cool ambient air to sweep in from the sides.
Making Aesthetics and Performance Work Together
A well-conditioned room is only comfortable if the equipment driving it can breathe. Before cutting lumber, ordering millwork, or installing decorative screens, verify your unit’s exact model clearances in the manufacturer installation manual. Build your framing with lightweight, removable panels, prioritize open airflow over dense coverage, and maintain clear paths for both supply air and return intake. When you respect the physics of air distribution, you get the best of both worlds: a beautifully designed room and an HVAC system that keeps you comfortable for years to come.